
Creating a New Notation
Creating a new notation allows you to change the renderings of objects. A notation is assigned to each module (Document modules, Object modules, and Unit test modules). The notation currently assigned to a module is selectable using a combo box in the header of the module.
To create a new notation:
- Create a new or open an existing Object Module.
- Right click anywhere in the object module and select Insert namespace to create a new namespace.
- In the empty box in the namespace, type "notations" and select the Notations namespace from the autocomplete.
- In the Notations namespace, create a new object by pressing Ctrl + Insert. Now edit the name of the object. For example, we could create a notation called MyNotation.
- Select Object in the type definition, delete it and change the object type to Notation.
There are two properties that are normally added to notation objects. The RenderingNameList property indicates the Rendering names that are used to rendering objects in the notation. The Stylesheet property is used to determine which styles are used for the notation. The steps to add these properties are:
- Right click on the object and select Add property to add a new property to the object.
- In the empty box for the new property, we want a RenderingNameList object. Create this object by starting to type "renderingnamelist" in the empty box and selecting the RenderingNameList object from the autocomplete popup.
- Add one or more rendering names in the empty box for the RenderingNameList. If you enter more than one rendering name, they will be inside of a List object.
- Add another property to the new object. You can do this by pressing Enter (to add a property below) or Insert (to add a property above or by right clicking and selecting Add property from the context menu.
- In the empty box for the new property, type "stylesheet" and select Stylesheet from the autocomplete popup.
- Enter one of the existing stylesheets in the empty box after "Stylesheet: []" in the new property. You can also create a new stylesheet before you make this entry.
At this point you should have a object module that looks something like this:
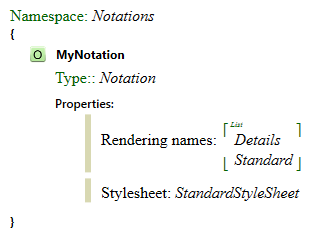
Now press F6 to run the build. The notation should now appear in the notation combo box at the top of each module. Note that objects will be rendered in MyNotation in exactly the same way as in the Standard notation. Typically, we will also want to create a new rendering name to using with the new notation and change the RenderingNameList property to contain a list of names. Following basically the same steps as were used to create the notation, we might create this:
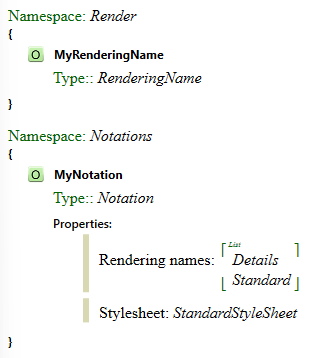
Typically, it makes sense to use the same name for the rendering name object as was used for the new notation. Since they are in different namespaces, they still are different objects even if you use that same name. We haven't done that in this example for clarity.
Once you actually create renderings for some objects that use the new rendering name, then you should see renderings change when you select MyNotation as the notation for a module. For example, we could choose to render the Not object differently in MyNotation:
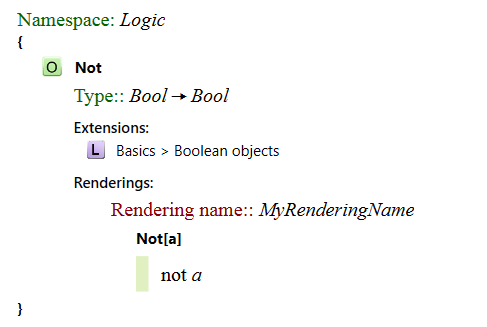
We have listed both MyRenderingName and Standard as rendering names for the new notation. When each object is rendered in MyNotation, the app will look for renderings in the order that they appear in list, so at this point, the Not object is the only object that will change when you switch from Standard notation to MyNotation. For more information on creating renderings see The Rendering Editor.
If you want to create a new reusable notation, consider creating a library where the only content is the definition of a new notation (as above) and extensions to object definitions (like the Not example above) for any objects that are rendered differently in the new notation. Now all that's required to use the notation is to reference this library and assign the notation to the appropriate modules.