Working with Groups
Creating a group in a rendering allows you to treat multiple components of the rendering as a single entity for purposes of positioning and scaling. As an example, if a rendering contains parentheses and there are multiple components of the rendering inside of the parentheses, the components inside the parentheses can be put in a group so that the parentheses can be set to scale to the size of the group. There are some renderings where creating a group is necessary to get the rendering to display in the desired manner.
A group connects multiple components to form a single new component. This group will then respond as a single unit to other elements in the object. Groups are used for rendering only and do not affect mathematics or other functionality.
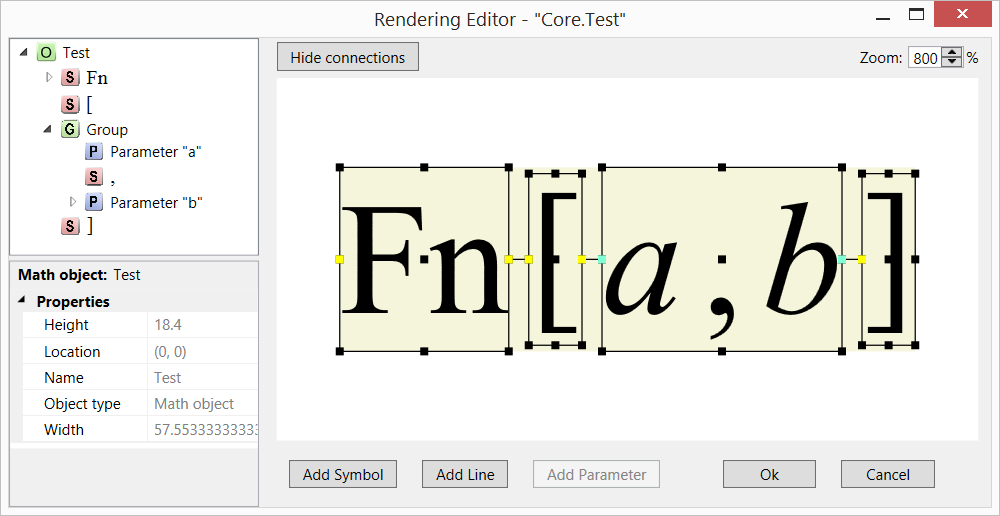
An example of when it is beneficial to create a group is this object:

The symbols in this object ([ and ]) are intended to scale vertically in relation to the height of the parameters "a" and "b". To do this, we group the parameters and set the symbols to scale to the group. This ensures that the symbols will scale to the height of either of the parameters.
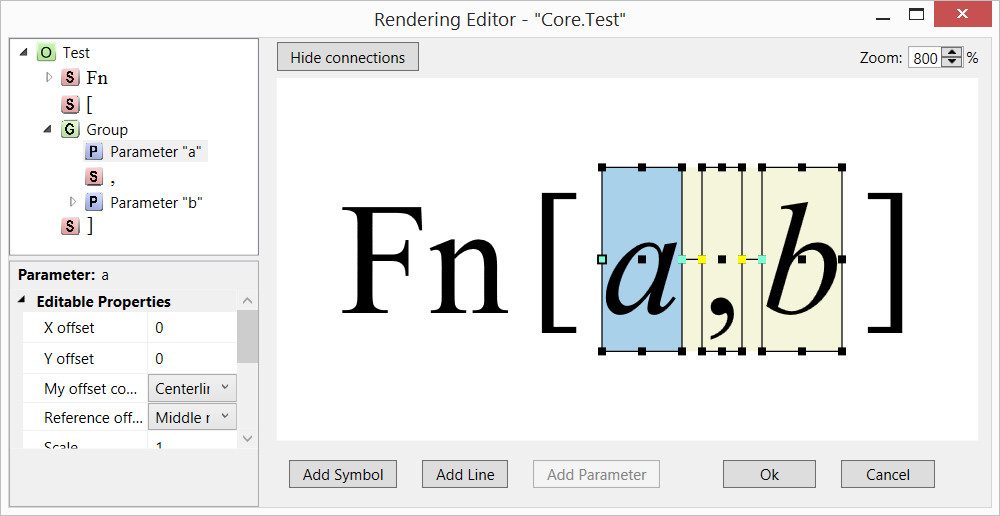
Grouped elements are displayed with one large box surrounding the entire group. You can also edit the connections between the elements inside of a group. To do this, either double click inside the box containing the group in the Display Area or click on any of the elements of the group in the Rendering Tree.

Note that the connections and frames are only shown around the components of the group. You can edit the positioning and connections between these elements in exactly the same way as you would for an object that doesn't have any groups. The only limitation is that you can't directly connect a component inside of a group to any of the components that are not members of the group.
To group elements:
- In the Rendering Tree, right-click the object name.
- Select New group from the pop-up.
- Drag elements in the Rendering Tree and drop them onto the Group node.
- Drag the elements of the group into the appropriate order.
To remove elements from a group, click and drag the element in the Rendering Tree to a location outside the group tree. Note that you must use the Rendering Tree to move components of a rendering into and out of a group. Note that if you move an element of a rendering to a different group, any scaling to or from that element is removed.
To delete a group:
- Remove any elements from the group that you want to keep by dragging the elements outside of the Group in the Rendering Tree
- Highlight the group in the Rendering Tree
- Press the delete key, or right-click the group and select Delete from the pop-up menu
- You cannot delete a group if it contains parameters. Move the parameters outside the group, then delete the group.
- One of the components in any group will own the centerline of the group. See Understanding the Centerline for more details.
